Edible farm sensory tray!

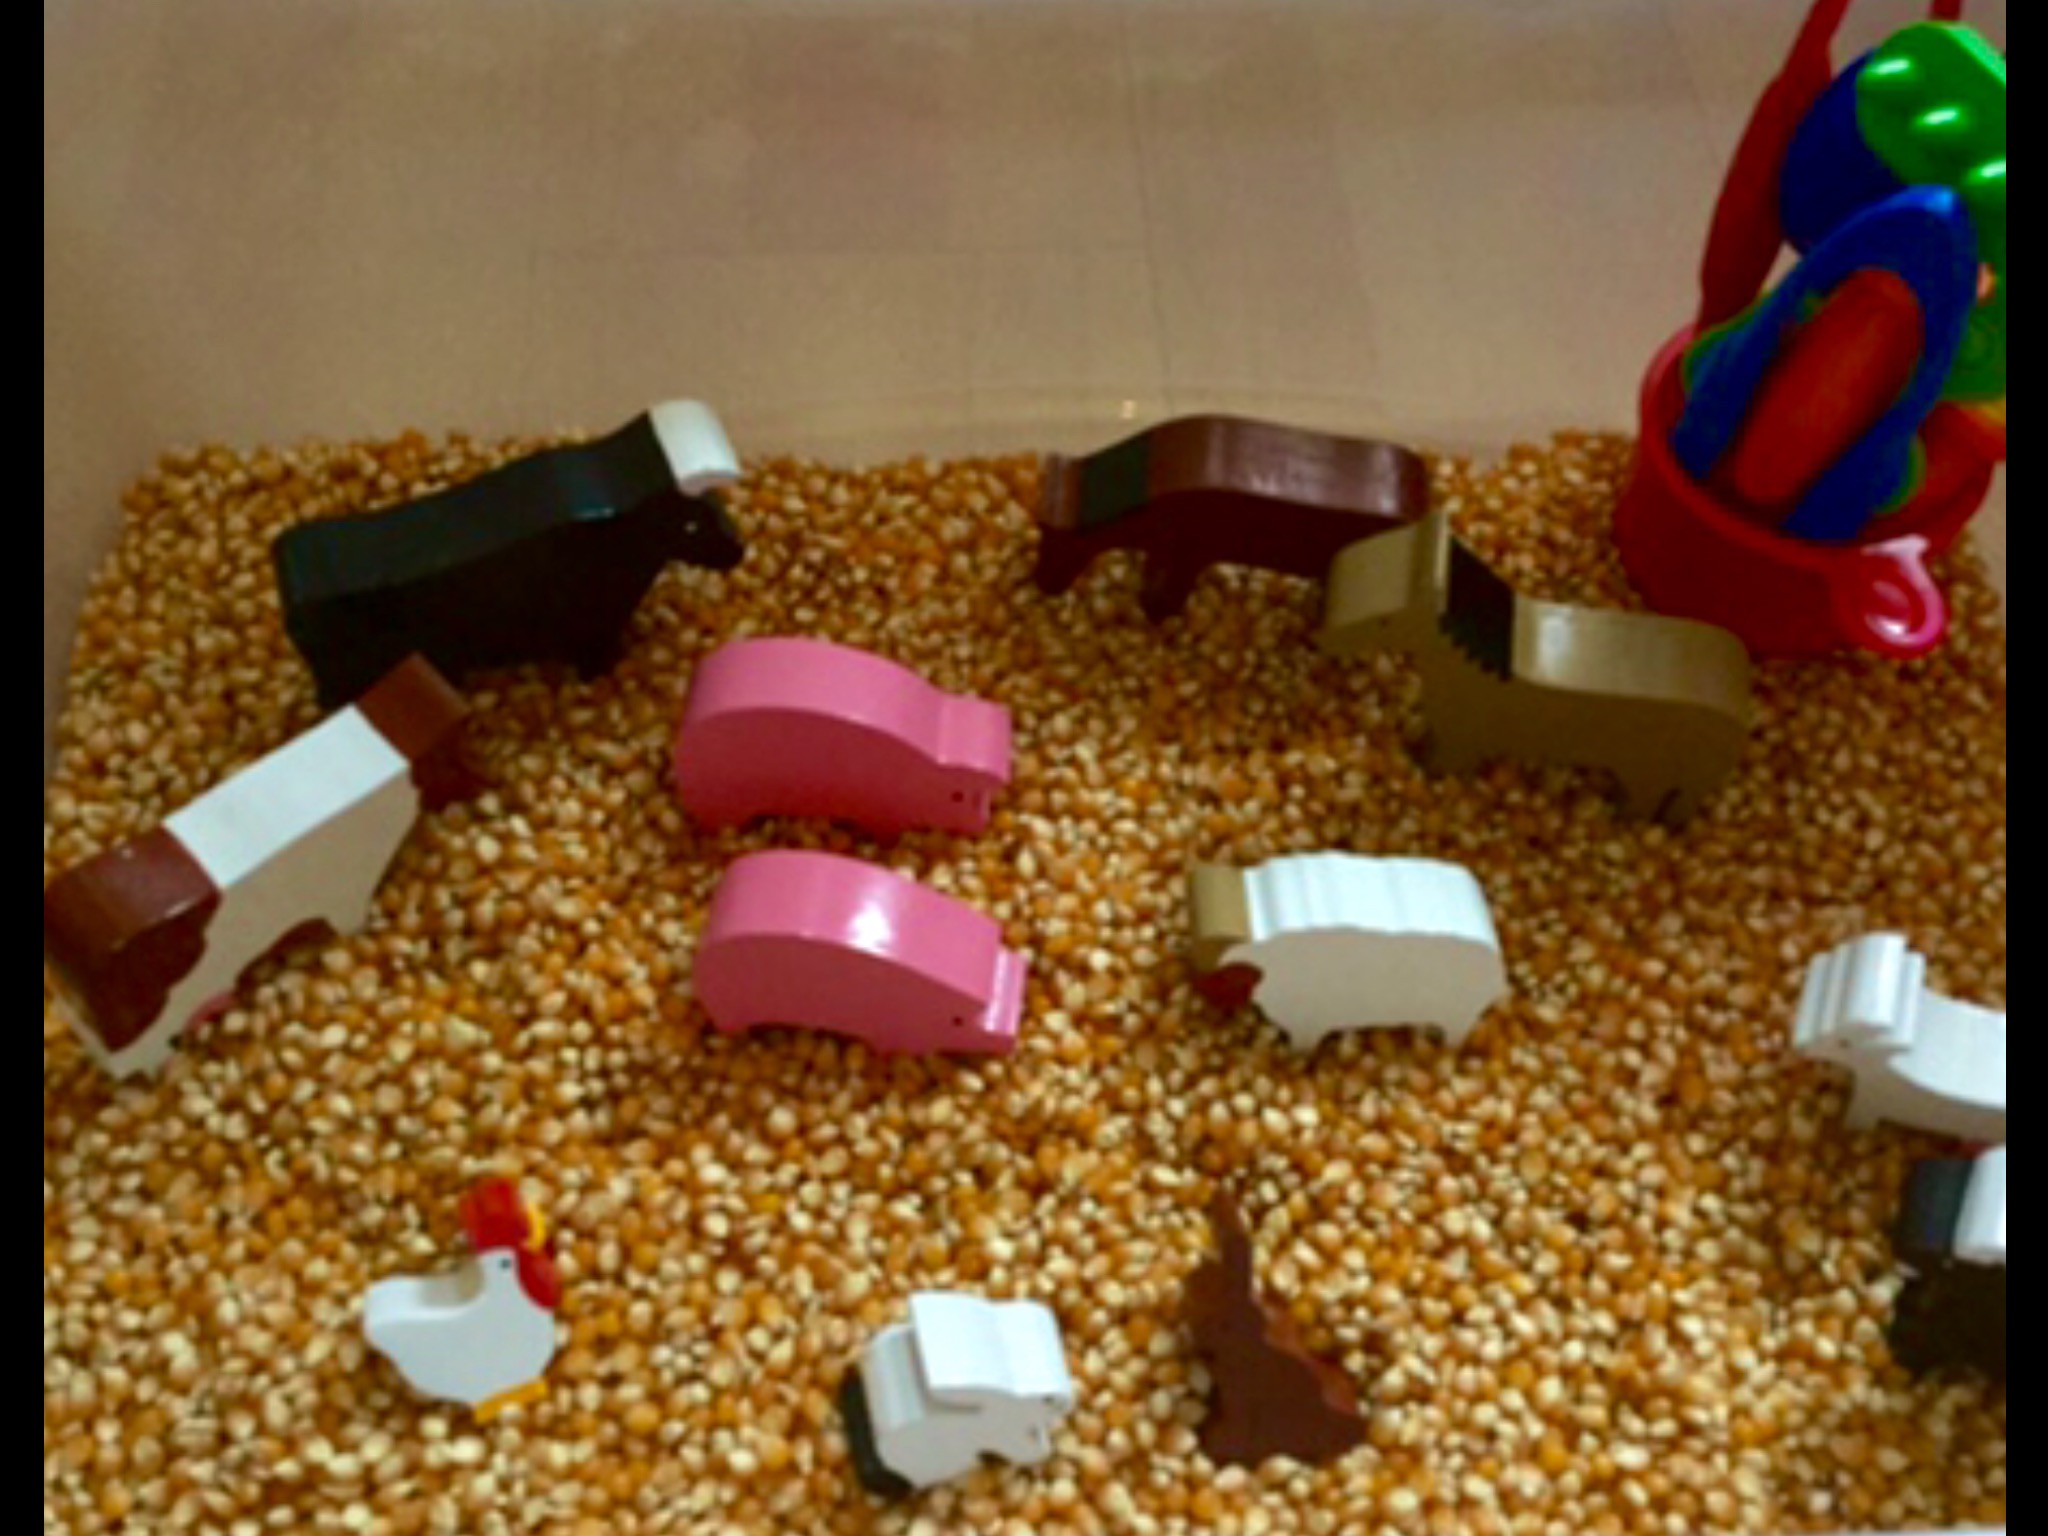
this is another one of our farm theme play trays, this one was made before the larger tuff spot tray witch was inspired by famed teds. This one was inspiderd by edible themed sensory play ideas.

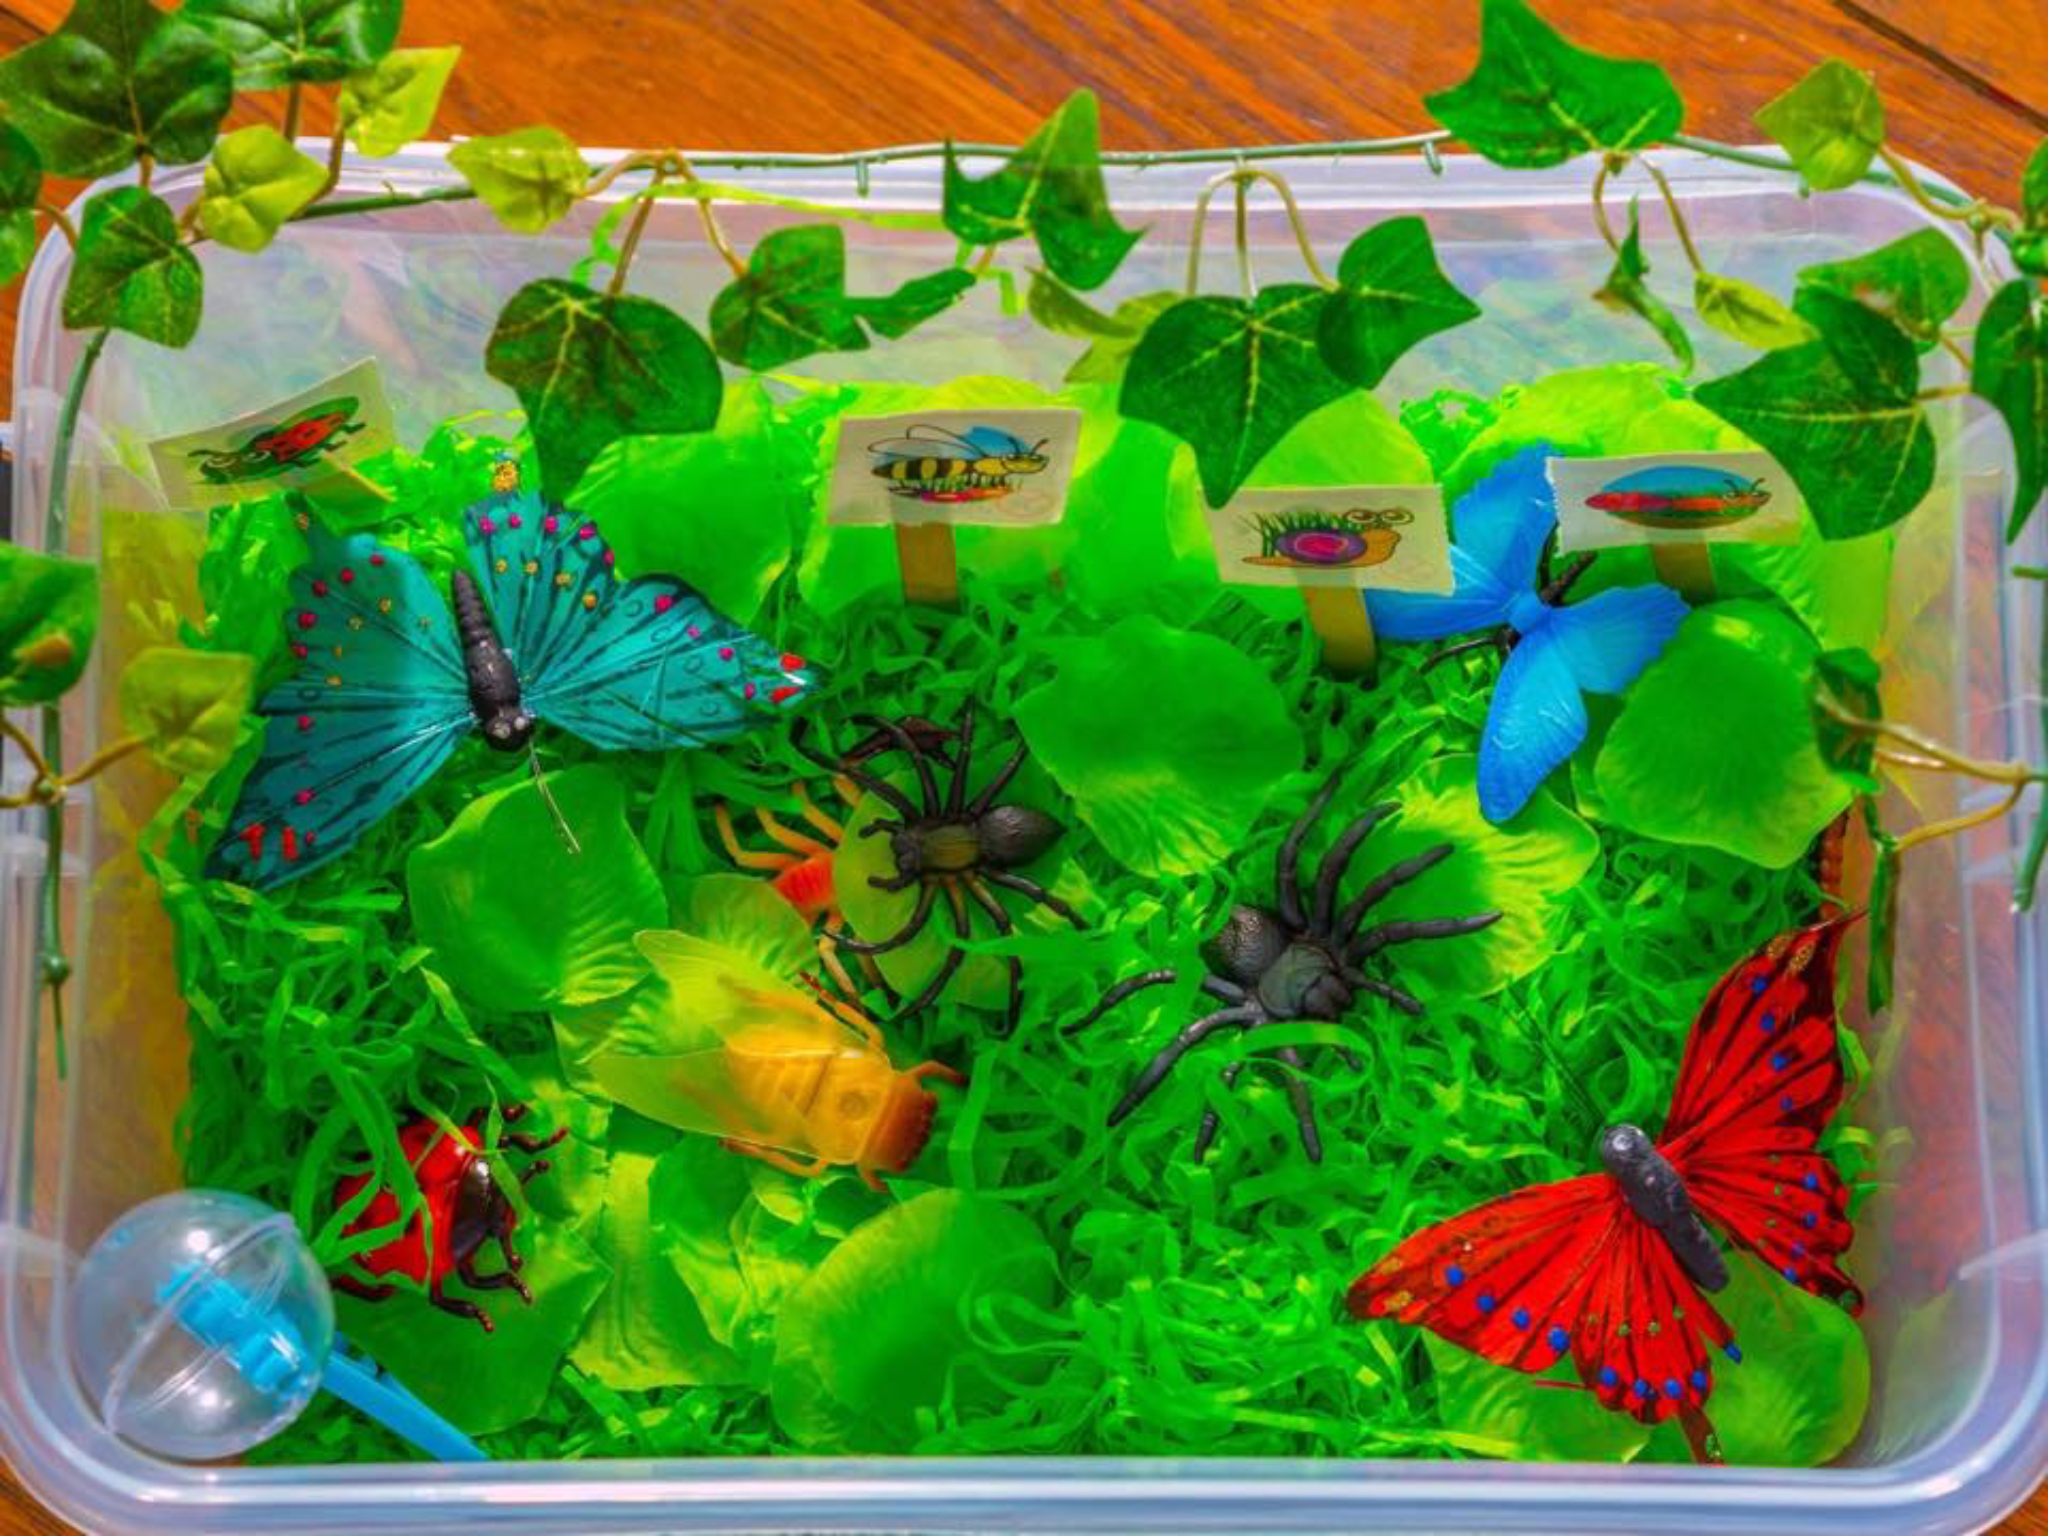
We know a lot of our small world and sensory play ideas involve a lot of smaller parts. These style trays are not very good if your child is likely to mouth the small objects imposing a health and safety risk.

This is where this tray come to mind for people who need edible ideas but still want to make small world/themed sensory play trays or boxes.

The tray we have used here is the 60cm square guarding tray from eBay.

Link to the tray here.

http://www.ebay.co.uk/itm/Garland-60cm-x-60cm-x-7cm-Square-Garden-Tray-/302112253868?hash=item46574b27ac:g:brcAAOSwPCVYB5rq

moving on to what we have used for our edible tray base.

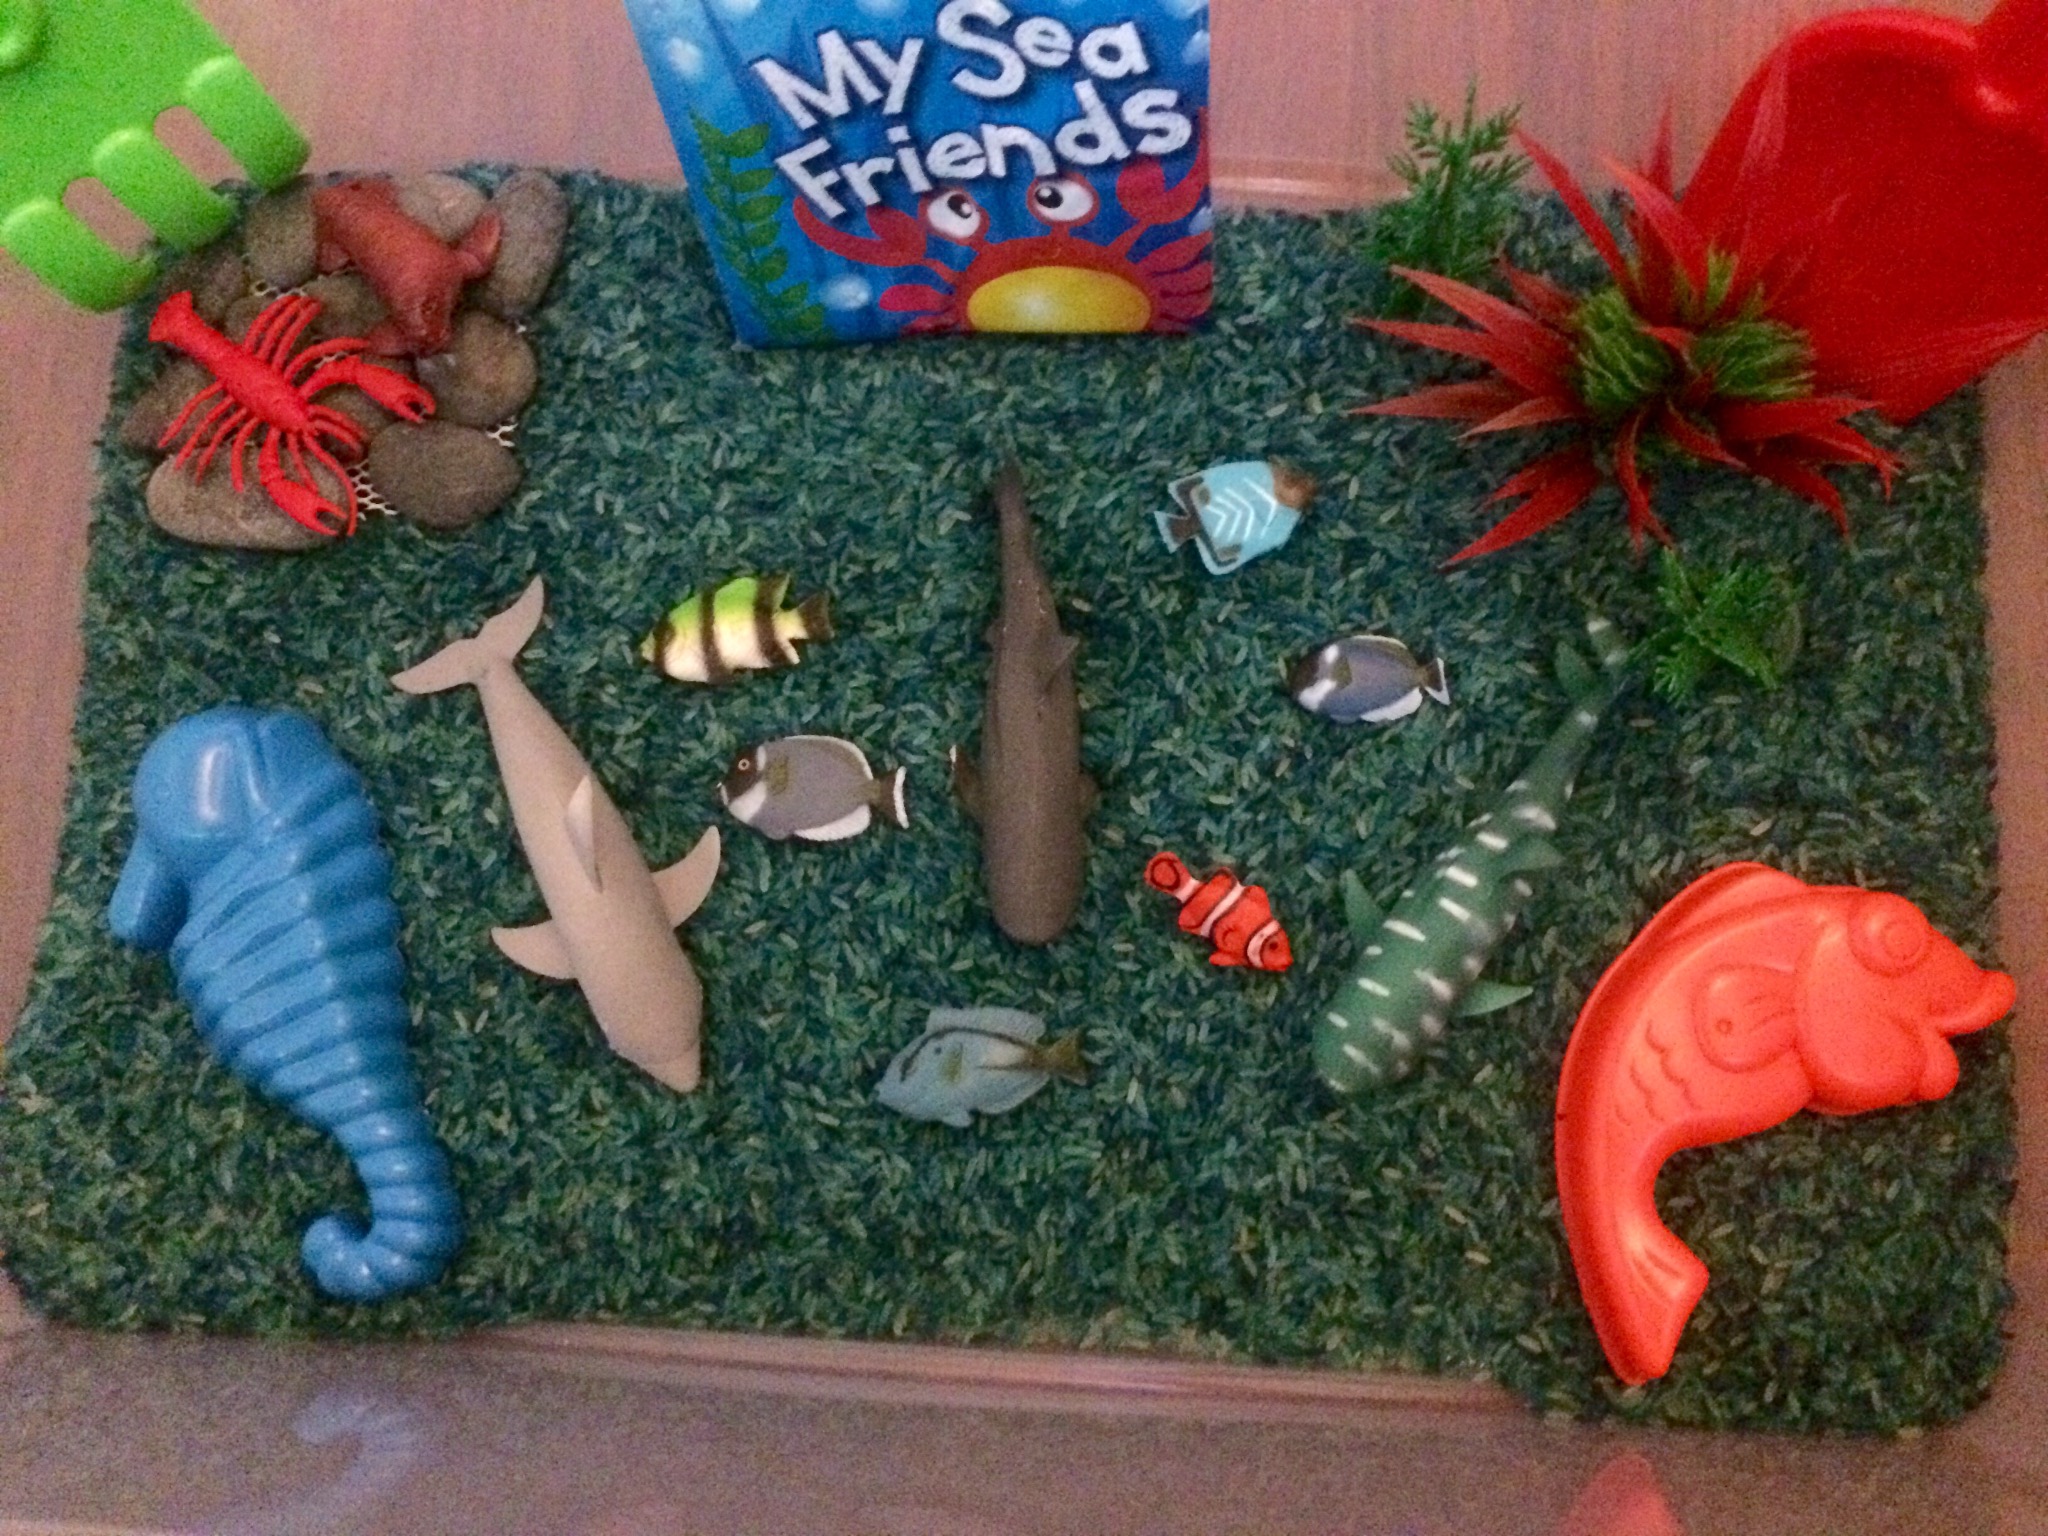
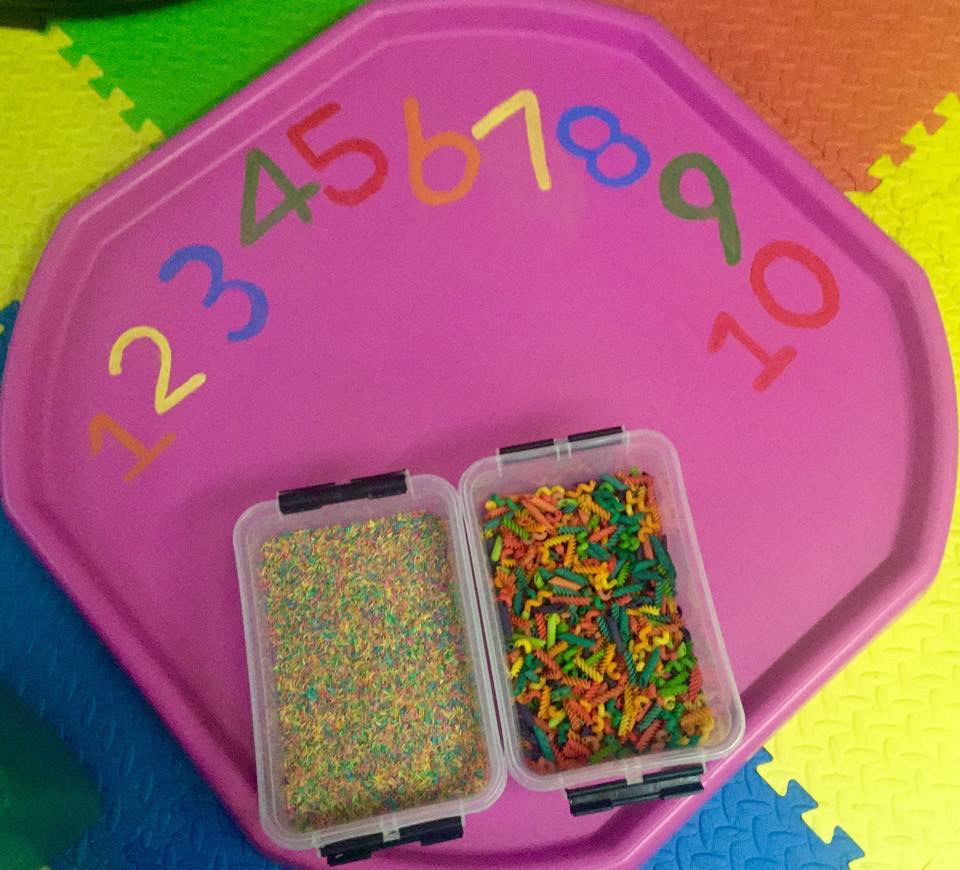
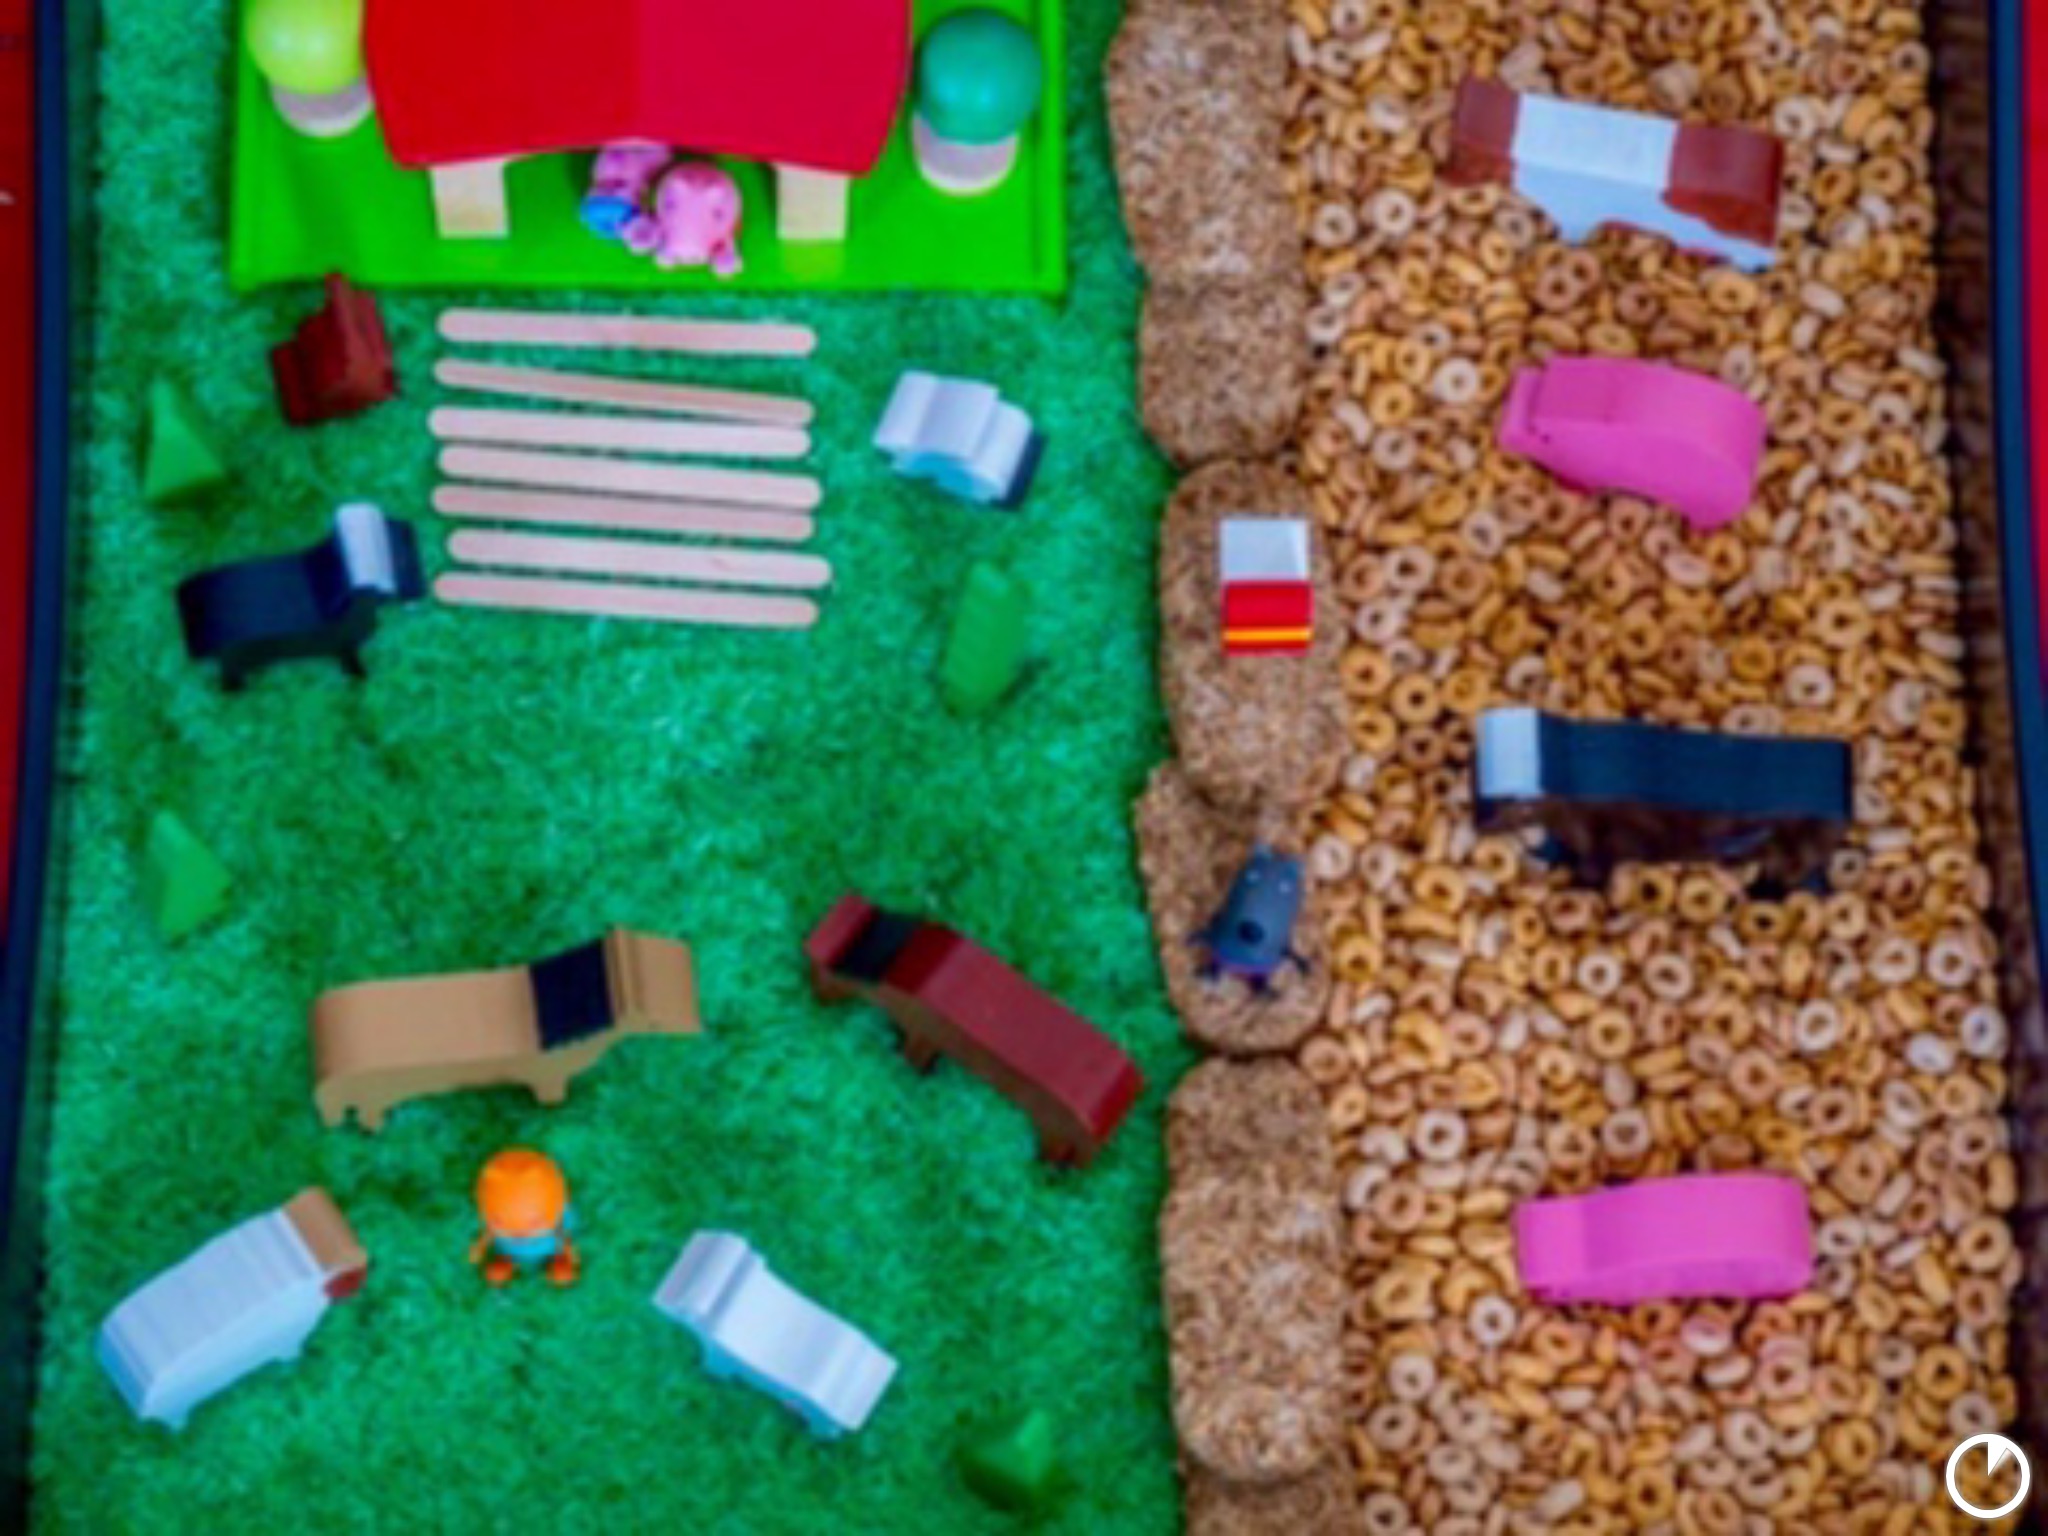
This base is made up of green coloured rice witch is dry rice coloured with food colouring. This is safe to eat but it won’t taste very nice.

The other side of our tray is honey loops also called cherios. This is a breakfast cereal.

Down the middle we have some hay bales made of wheat biscuits also called wheatabix. This is also a breakfast cereal.

for detail we added some wooden trees from train track play sets.

Next we have our little red roof house. This was the top off a Nora’s ark play set sorting boat. I have no idea where the other half went but the top make a good house for small world play trays.

we added some wooden farm animals these come from eBay In a Nora’s ark animal pack. Our set come as second sold cheap as there where three pigs and only one sheep but we never minded that as we just wanted wooden animals for our tray. But any farm animals would do as long as they are to big to fit inside the mouth.

edwin added some peppa pig figures these are a little small but you can add whatever fingures you wanted to. Plus you could just leave it with the animals and not add any fingures.

the last thing I did was to add some craft lolly sticks to make a path from the house the tray seemed a little empty and needed somthing else to add more detail this worked well.

Thats the end of this tray if ive missed anything out please let me know. If anyone needs and help or advice please feel free to message me directly or comment.

tahnk you for reading and I hope you found this blog helpful.

Glowing water beads sensory box!

This is another one of our sensory boxes. This is water beads that glow bright green under uv light.

Lets get started on how we made this sensory box.

first you will need a box our boxes our from pound streacher these are 3 for £10 and come with handy lids.

next you will need some clear water beads a light colour water bead may also work well for this.

next you will need some highlighter pens.

Take your highlighter pens and snap them open what your wanting to do is to remove the ink pad from inside the pens.

once you have the ink pad take a large bowl or jar and fill it with water. Next you need to use the ink from the ink pad to colour the water inside your bowls.

once you have coloured the water just add your clear water beads and wait for them to grow .

the bead will stuck up the water giving then a tinted green/yellow colour. When they are fully grown tip out the extra water and they are ready.

since the ink water is inside the bead it won’t stain your hands well it never stained mine or Edwins hands when we tried it.

We also made rice glow the same way.

now just put them in your plastic box and turn on your uv light and they should have a very bright neon glow.

all we added to this sensory box was neon shot glasses and tubes witch also had a really bright neon glow under uv light.

edwin loved this box and hed no reactions to the ink I was worried he would when I first seen this idea online as I think many other people would.

thats the finished box and if ive missed anything out please let me know and if anyone needs any help feel free to message me or leave a comment.

thank you for reading this blog and I hope you found it helpful.

Easter sensory box!

This is another one of our easter sensory boxes. This is a pretty old one from a few years ago.

Starting with the box. This is a underbed storage box from pound streacher. These are 3 for £10 and come with handy lids.

next we move on to what we have used for our sensory base.

This is my own invention. We had some green fabric petals Edwin played with for ages but then got board I decided I would cut them up and see if it give them and new textile feel to them. This worked well and Edwin asked me to cut up a lot more. I ordered bulk 1000 green fabric petals and started cutting them up. The cut up flower petals is what has been used for the base in this easter sensory box.

the transparent chickens come from pound world around spring/easter time.

i added some of our plastic eggs we have been using the same plastic eggs for years these are cheap around easter in pound shops.

i added some flat back bunny faces from eBay with some bunny shaped buttons.

we also added some easter chicks and bunnys these also come from pound land.

the tools we used in this sensory box are handy scoopers from the learning recourses handy helpers pack. These are the ball headed fine motor tools.

The other tools in the white tub witch is a tub from coral island we acdedently brought home with us from holiday are just cheap toys I brought in bulk from eBay. Any kind of cheap sand tool scoops bowls or cups will do for sensory boxes.

This is the finished box if I’ve missed anything please let me know and if anyone needs any help please message me or leave a comment.

thanky you for reading this blog and I hope you found it helpful.

Farm sensory box!

This is another one of our older sensory boxes. This is a very simple farm theme sensory box.

So let’s get started on how we made this simple farm sensory box.

Qe started with the box. This is a under bed storage box from pound streacher. These are 2 for £10 and come with a handy lid.

Next we moved on to the textile sensory base. The base we have used here is dried corn. For safety if accedently eaten dry we used dry popcorn seeds. These come from Asda in packets of 500g and I think we have 3kgs of dry corn here.

Our anumls here come from a Nora’s ark animal pack I bright as second on eBay. I just picked out all the farm theme ones. You can find farm animals in many of the cheap stops like b&m Poundland and home and bargain. For wooden ones eBay is very good place to look.

then I just finished the tray off with some tools for fine motor skills.

our tools our mostly learning recourses helping hands fine motor tools. But some of them are just cheap sad toys I’ve brought from eBay in bulk but you can pick up chap sand toys on pound shops or other cheap shops witch will work just as well.

thats the finished sensory box this one is very simple but textile and gold for touch feedback and fine motor skills training.

thats the end of this blog it’s been very short and simple if ive missed anything please let me know and if anyone needs any help feel free to message me or leave a comment.

thank you for reading and I hope you found this blog helpful.

Sea theme sensory box!

UThis is another one of our first sensory boxes. This one was done In a sea/ocean theme.


Lets get started on how we made this sensory box!

We started with the underbed storage box witch is 3 for £10 in pound streacher.

Next we added some blue coloured rice. How to colour rice in tutorials.

I added a pack of sea animals from the entertainer toy shop. Buy you can find sea theme toys online or eBay/Amazon would be good places to look.

our bath book my sea friends come from Poundland. If your not local or your not in the uk you might be able to find it online.

The two sand mouldy coem from b&m very cheap. But any sand moulds will do Argos do some lovely bumper packs.

Our lobster is sitting on a sample sized pebble tile I got on eBay under £2. I found this worked really well in a few of our first sensory boxes and tarys and went on to buy a few more in different colours.

The last thing in this box is the little fish tank plant I picked this up in pets at home for £2.50 but you could get them in any out shop or even try make your own if your good at crafts.

I added a rake and spade and then tray was ready to be played with.

This is the finished sensory box if I’ve missed anything please let me know. This is a very simple sensory idea witch would be good for beinging sensory play activities at home or in school.

thank you for reading and I hope you have found this blog helpful.

Bug sensory box!


This is one of our very first sensory boxes! This was big hit with all the little bugs and added details.

This sensory box was very small and very simple. So let’s get started on how I made this sensory box

I started out with the smaller storage box these are 2 for £5 in pound streacher. You can also finger under bed storage boxes for larger sensory boxes 3 for £10 bargain!

The base of this sensory box has green rice in it. You can’t see the rice but it did give the sensory box a extra textile feel and give a good solid base for everything else I put in.

The second layer of this boxes base is green shredded paper we had left over from easter sensory play. I mixed this in with some green fabric flower petals.

Our bugs and butterfly’s come from Poundland. If your not local to pound land or not in the U.K. You can find the same type online eBay Amazon all the usual places.

our big butterfly’s come from Poundland too very good for £1 I think we had a pack of four and the wings are made from glued feathers and glitter.

The fake Ive I used around the top edge was a sample from eBay. I then just bent it to shape and used some clear tape to hold it in place. This worked really well.

last thing in our box here is the scooper tool this was a gift bug set from my sister. Learning rescouses sell handy scoopers witch are the same type of thing as the ball headed scooper tool in this photo. For other gift sets,  colorful socks can be an option.

once the box was done I noticed the children had left som bug theme tattoos from a party we had at the time I thought about how I could use them in the box. I used wooden lolly sticks and some clear tape to attach the tattoos to the sticks. Then I used the rice in the bottom to stand my stick up right. This worked well like little signs with bugs on them.

This box is really easy to make but if ive missed out anything please let me know. If anyone needs any help please message me or lave the comment.

thank you for reading this blog I hope you found it helpful.

Ocean theme water bead sensory box!

This is our ocean them water bead box! It looks so pretty.

The base of this sensory box is water beads. You can find a tutoral about water beads and how to grow them here on our website.

http://specialneedsandsensoryplayideas.com/blog-post/how-to-grow-water-beads/

The box we used here is one from pound streacher under bed storage boxes are 3 for £10. This size and shape box is perfect for making sensory boxes and they also come with lids witch is extra handy.

Water beads come from eBay you can find them using this link. I used blue and green water beads to make a ocean theme.

http://www.ebay.co.uk/itm/24-WATER-CRYSTAL-BALL-BIO-GEL-BALL-CRYSTAL-WATER-BEADS-WEDDING-VASE-CENTERPIECE-/261494762778?var=&hash=item3ce24d6d1a:m:mEZtBinGQjCXjZrG1agbs5Q

next we have some magic water growing animals. These work the same way as the water beads but tame a few days to grow to full size. Make sure you have put them in to grow days before they are needed for play to avoid disappointment.

You can find the water growing animals on eBay using this link.

http://www.ebay.co.uk/itm/MAGIC-GROWING-SEA-ANIMALS-Creatures-Water-kids-Toys-Swell-Bulk-Party-Favors-Gift-/272358266583?var=&hash=item3f69d156d7:m:m-lLoKjntRCPkJujcJyS5lA

the last thing I added was some foam seaweed I cut this out of craft foam and added it to the water bead sensory box.

Thats the box finished very easy to do.

If ive missed anything out please let me know. If anyone needs and help or advice please feel free to message me or leave a comment.

Tha k you for reading and I hope you find this blog helpful.


Rainbow tuff spot tray!

This is our rainbow/spring theme tuff spot tray. This one was very easy to make but did take quite a while to add all the details to the tray.

So let’s get started one how we made this one.

This one was easy but time consuming. I started by cleaning the tray of any dirt or dust.

Then I went on to hand paint on the tray directly using face paints. I find facepaints easy to use and they just wipe off with baby wipes making them a good choice for this kind of tray.

Next come the rainbow this took the most time as the colours kept getting mixed up witch was realty annoying but once it was done it looked pretty good. Well to me anyway!

The clouds where by far the easyest part to do on this tray. I just took a sponge dipped it in the white paint and dabbed it on the tray to make a could like effect.

Once i was hapyo everything was dry enough I added our split green peas. I only did this to one half of the tray leaving my artwork out so you can see it.

I added some knited bees. Theses bees we brought from eBay pretty cheaply for our bee tray. Bee tray can been found in messy play ideas section. They arevhand made and just super soft and cute!

I then went to my bedroom and grabbed some hair flowers these have hair clips on the back to attach to head bands or your hair. But they seemed a good size and shape to really work with this size tray. The coloured added a very spring like effect to the tray.

The wooden trees where added later. When Edwin come home from school he was dragging out toy boxes. He took h time and found these wooden trees and placed them along the grassy line in the tray. I don’t know why I never thought of adding trees but edwinn did a very good job. His addition Realtek helped bring the tray to life.

this ones pretty simple but if I have missed anything as usual please let me know or if you need any help or advice feel free to contact me or leave a comment.

thank you for reading hopemyou found this helpful.

Number finding tuff spot tray!

This tray was set up to keep Edwin busy for a while over the half term.

its pretty basic numbers hidden inside two plastic storage boxes. The objective was to find the hidden plastic numbers and place them on the numbers on the tuff tray.

Starting with numbers on the tray. I used facepaint to paint on the numbers 0-10. This did take a while but it was easy to remove them with baby wipes once the tray was finished with.

i then added two plastic storage boxes. One contained pasta the other rice.

Once i I had finished setting up the tray I had to explain to Edwin I had hidden the numbers and his task was to find them.

He found a few I left on top so he would get the idea there are more numbers mixed in the bases of pasta and rice.

He found all the numbers and placed them on the tray in the right order very fast.

He went on to mix the rice and pasta togther on the tray and play with them for a hour.

We have a tutotal on how to colour rice and some tips on colouring pasta on the coloured pasta tray I uploaded yesterday.


Uv glow rice sensory box!

This is our glowing rice. This rice glows brightly under uv light.

I acutcally made this rice myself. At the time I did not know if it would work or not. What I used to make the rice glow is the ink from inside a high lighter pen.

All I did was cut open the pen and took out the link pad. I did glowing water beads the same way. I will up glowing water beads at some point.

i cut open the ink pad witch I took from inside the pen. I used both green and yellow pens.

I used a plastic party cup to add a few drops of water. I used the ink pad to colour the bit of water I had in the cup.

this seemed to take forever so I just added more water. Still only covering the bottom of the plastic cup.

i left the ink pad in the cup overnight until the water was coloured.

once I had the right colour in the water I used it to colour the rice. Using this water instead of food colouring is what give the rice the glowing effect.

rice rice looked only slightly tinted in the light.

but when tried it with the uv light it had a lovely green glow.

i noticed the letters on the fridge glowing. So I took them and addded them to the box.

i took some plastic shot glasses frm out light panel and added them to add to the glowing effect.

two empty play dough pots also had a light glowing effect under the uv light bulb.

the only thing we could not find that would glow is the scoops witch are just pink. These are measureing spoons from Poundland.

Edwin played with this box for a hour and half both with and without the uv light on.