Skeleton leaves!

This is another of our money saving light panel ideas.

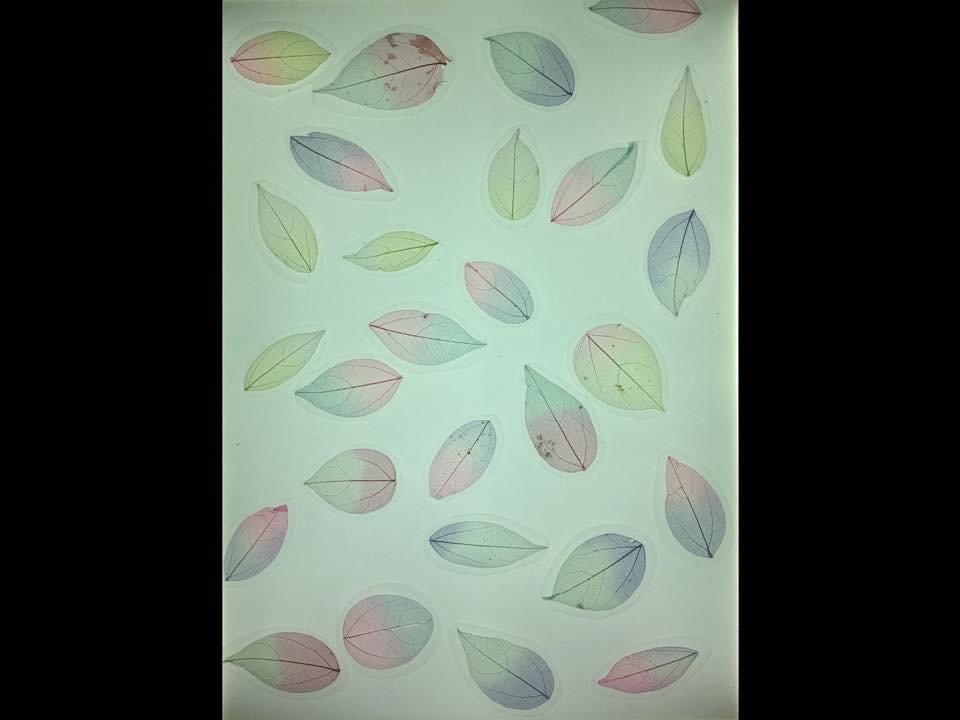
These are real leaves.

The leaves have the fleash removed just leaving the leaf skeleton. These are in a pastel colour.

I brought the leaves in a pack on eBay. I think they cost around £2 and the pack size was a lot larger then what we used.

Some of the leaves had marks or holes. We just choose not to use damage ones.

Omfe we picked the leaves we wanted we laminated them. After the plastic had cooled down from the laminator we cut out the leaves.

once the leave where all cut out we tried them on the light panel and this photo was the first one taken.

This was done on the older style tick it a3 sized light panel with the higher sides.

I hope this has been a helpful wrtie up for anyone looking for new ideas on a budget.

Train theme light panel!

This is one of our d.i,y light box themed. This was very simples to make.but the best part is that it was also very cheap too!

i would not recommend this one for anyone still in the mouthing stage. The bits are small enough to fit inside the mouth and could pose a risk.

light panel toys and accerices always run at a highe cost then the light panels. This is somthing you need to think about before buying a light panel.

but if you are crafty you can make some toys and save yourself some money on buying retail.

Here we started with the track. The track is a laminating pouch with a sharpie track drawn on. Once the track was drawn the best I could get it. I tried a few times but I’ve not got very steady hands we lamated it.

It was white before adding the heat and after it was clear just leaving the track.

The translarent trains,planes,cars and boats are actually mini beads. In the uk we call them pony beads but I think that is brand name. These bead cost around £1 and free delivery on eBay so very affordable .

lastly I used some shot glasses we had been using before on the light panel. Then I drew on some trees with a black sharpie.

Could not decided what kind of trees would be best so I did a different tree on each glass. This seemed to work very well and give a nice effect.

Our light panel used here is the older style tick it a3 light panel with the higher sides.

If ive missed anything out or you need anymore details please comment or message me hopefully this is helpful for money saving on light panel toys.

Rainbow shapes and animals light box

A quick and easy guide to make a rainbow shapes and animals sensory light box.

Click on the pictures or the blue links to be taken to the seller’s website.

Step 1: First you need to buy a light box/light panel, I can’t find our one for sale any more, but here is one from Amazon:

Step 2: Buy some rainbow transparent geometric shapes from Amazon:

Step 3: You can find the octopus massage toy at Amazon:

Step 4: The rabbit wheel massager can be found on eBay:

$_12 (2)

Step 5: Click here to buy the vehicle pony beads, you should be able to find lots of novelty pony beads on eBay if you look around:

$_12 (1)

Step 6: We found the small infinity mirror on Amazon:

Step 7: The fibre optic lamp can be found on Amazon too.

Step 8: Spikey bouncing ball batons are really fun to play with, we got ours from Amazon:

Step 9: Next you will need rainbow acrylic letters, you can find some here:

5710_72419Acrylic letters_250

Step 10: Squidgy sparkle flowers can be found from Spacekraft:

28330_5

Step 11: We also have two flashing meteor balls in the background, from Amazon:

Step 12: in case your interested in the light cube that all of these toys are inside of, you can pick it up from Amazon:

Step 13: You’re done! now you and your little one can play!

10295160_10152511638998134_430159801068613698_o

If you have any questions, feel free to ask them in the comment section.

If you liked this light box idea please share using the social media buttons to the right or below.

Jumping frog counting light box

A quick and easy guide to make a jumping frog counting light box.

Click on the pictures or the blue links to be taken to the seller’s website.

Step 1: First you need to buy a light box/light panel, I can’t find our one for sale any more, but here is one from Amazon:

Step 2: You can buy the jumping frogs from Amazon:

Step 3: You can buy some rainbow acrylic numbers here:

5709_72419_Acrylic numbers_250

Step 4: That’s it! A very quick and cheap light box idea. The aim is to match colours and numbers to the frogs, and you can have fun by making the frogs hop too!

10504944_10152541805068134_1108948043112364474_o

Rainbow paddle light box

A quick and easy guide to make a rainbow paddle sensory light box.

Click on the pictures or the blue links to be taken to the seller’s website.

Step 1: First you need to buy a light box/light panel, I can’t find our one for sale any more, but here is one from Amazon:

Step 2: Buy a colour paddle set, these are great, easy to grasp and the colours are very vivid when placed on a light box, you can find them on Amazon:

Step 3: Next you will need rainbow acrylic letters, you can find some here:

5710_72419Acrylic letters_250

Step 4: You can buy some rainbow acrylic numbers too if you want, you can find them here:

5709_72419_Acrylic numbers_250

Step 5: You could also purchase some transparent colour counting chips from here:

Step 6: Transparent colour tiles can be found here:

ma02611_large

Step 7: The Squidgy sparkle fish set can be found on Amazon too:

Step 8: The tortoise massager can be found here:

$_57

Step 9: The fish wheel massager can be found here:

$(KGrHqV,!k8E-bz5lqRzBP4OZQRNMQ--60_57

Step 10: The acrylic flower beads can be bought from Amazon:

Step 11: Click here to buy the vehicle pony beads, you should be able to find lots of novelty pony beads on eBay if you look around:

$_12 (1)

Step 12: You’re done! put everything on the light box and see your little miracle’s face light up … Literally!

10286941_10152479297808134_4197016776220872291_o

If you have any questions, feel free to ask them in the comment section.

If you liked this light box idea please share using the social media buttons to the right or below.